Import a hands-on scenario in one shot (5 min)
Import a scenario file (ZIP) through Portal, then verify its created resources and uploaded data.
By the end of this tutorial
- Import a scenario file (ZIP) through Portal without extracting it.
- Distinguish preflight validation from the actual import result.
- Verify the created collection and its data rows.
You do not need a terminal, Python, or Git. Every step happens in Portal.
1. Download the scenario file
This tutorial uses the Retail Inventory Intelligence scenario. Download its ZIP below.
retail_inventory_intelligence.zip Download(1.5 MB)The ZIP contains collection, dataset, code, pipeline, ontology, dashboard, and Agent definitions. Do not extract or modify it.
2. Open collection Import
- Open Collections from the left navigation in Portal.
- Open More options (⋯) in the upper-right corner and select Import. The Import Collection dialog opens.
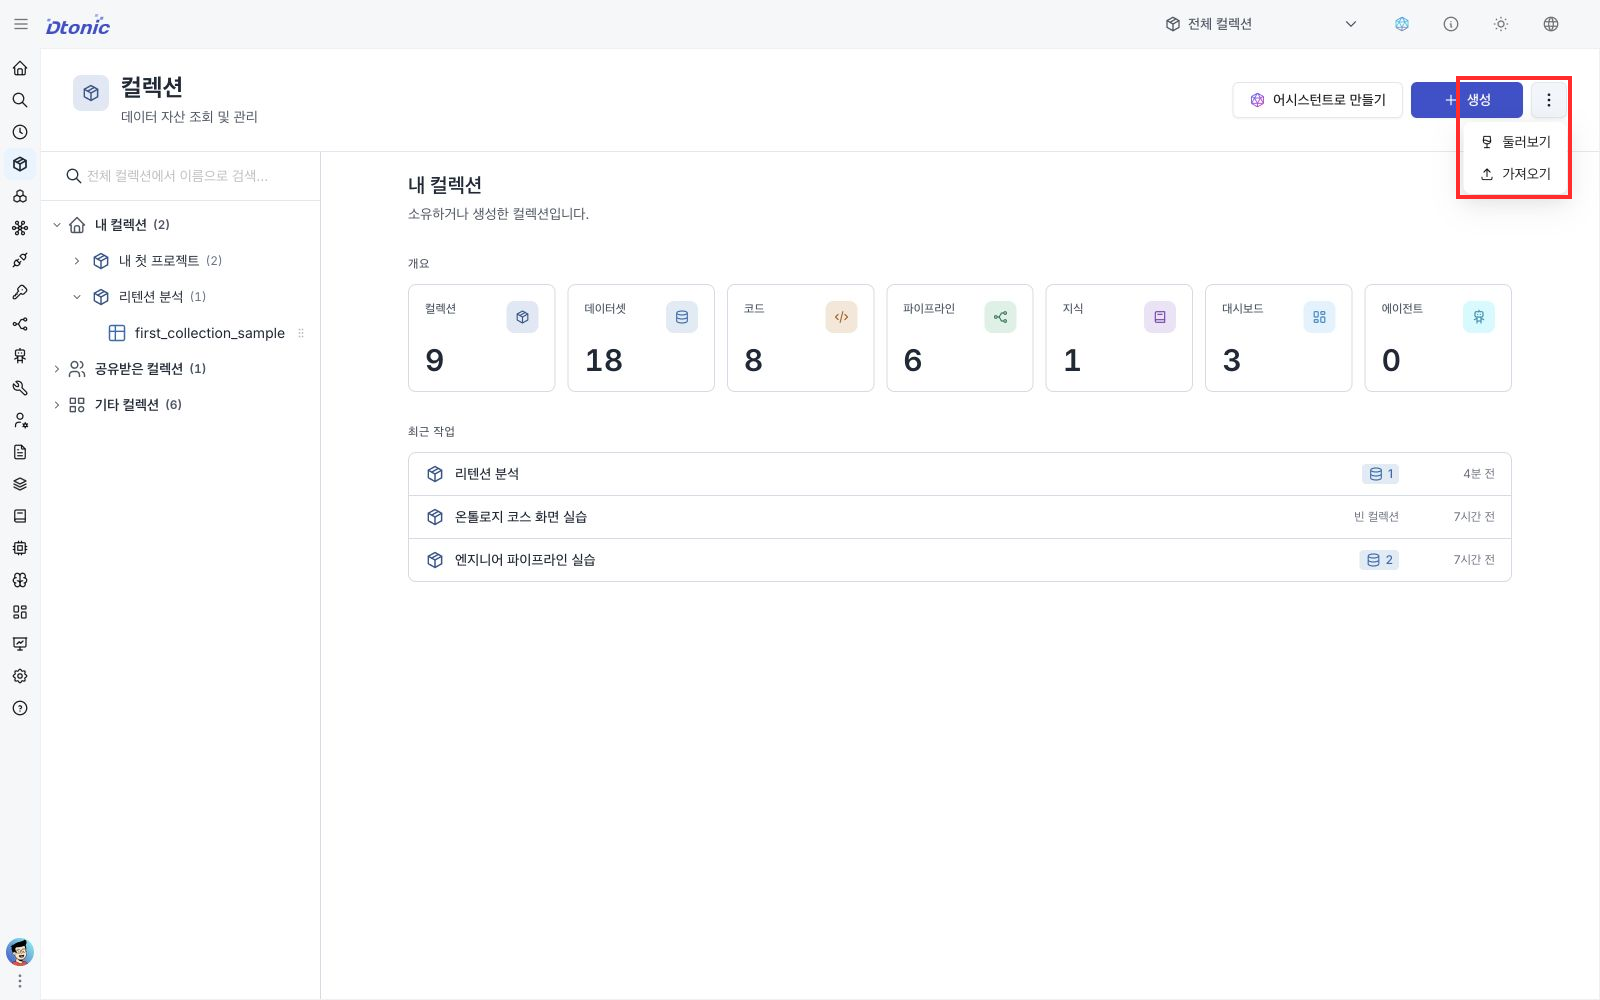
If you do not have any collections yet, Import is still available from the same More options (⋯) menu.
3. Validate and import the ZIP
- Choose the downloaded
retail_inventory_intelligence.zipin the Import dialog. - After Portal analyzes the file, review the validation result and any conflicts.
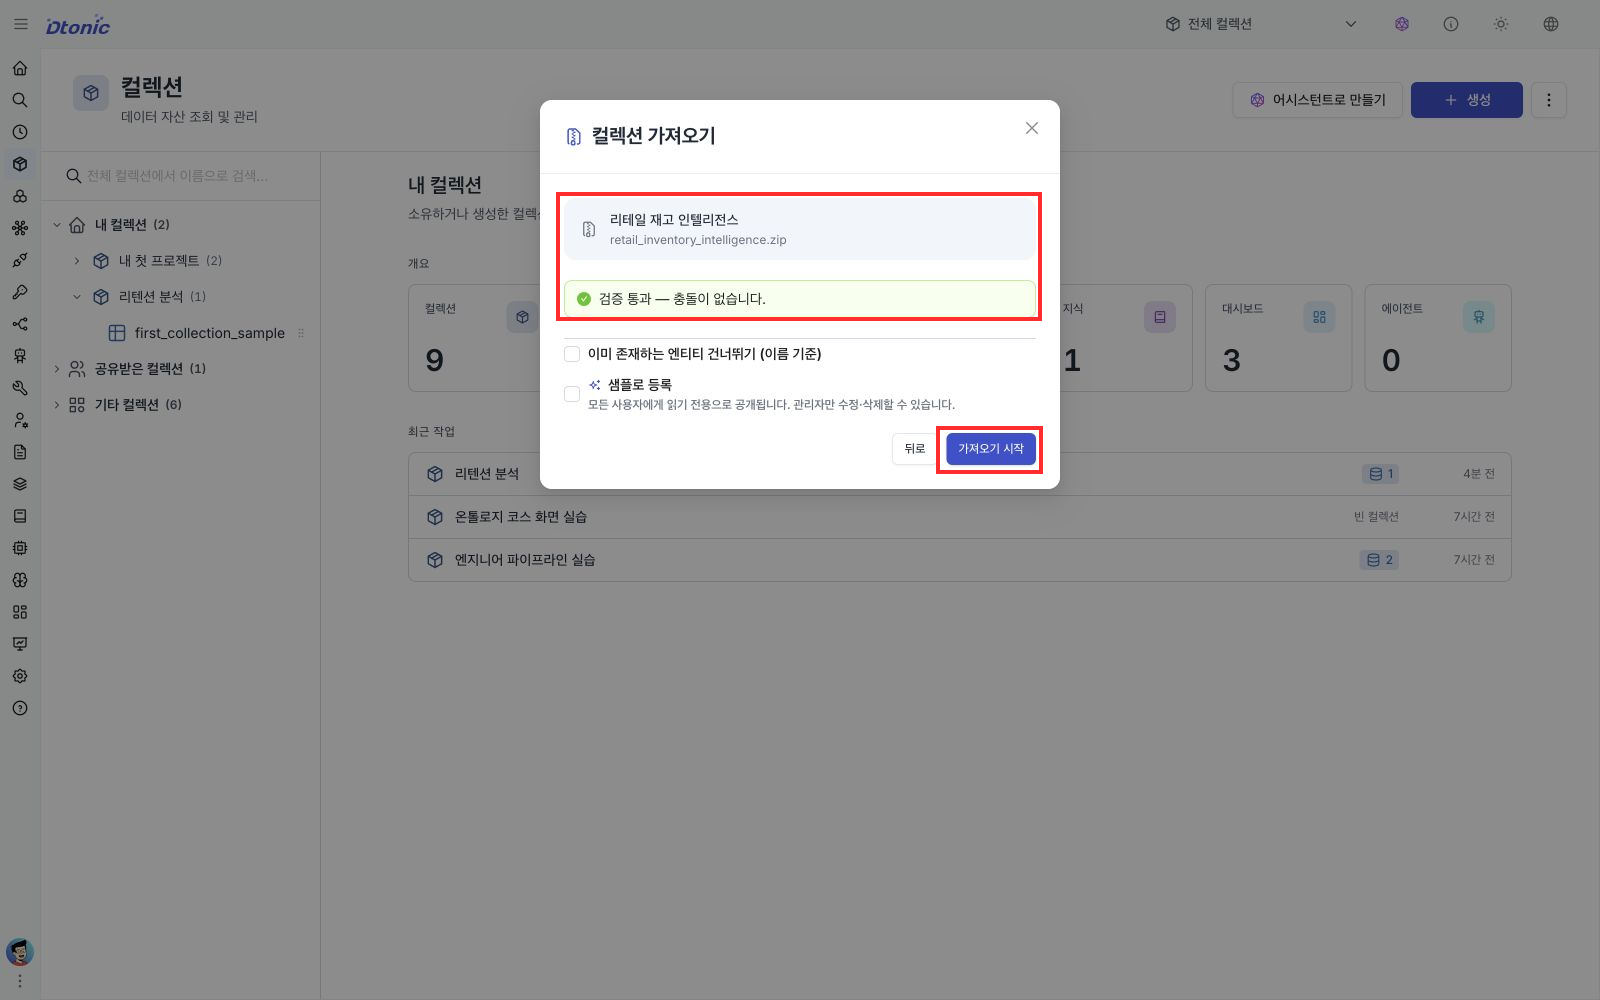
- If there is no blocking error, select Start Import at the bottom and keep the dialog open until the result appears.
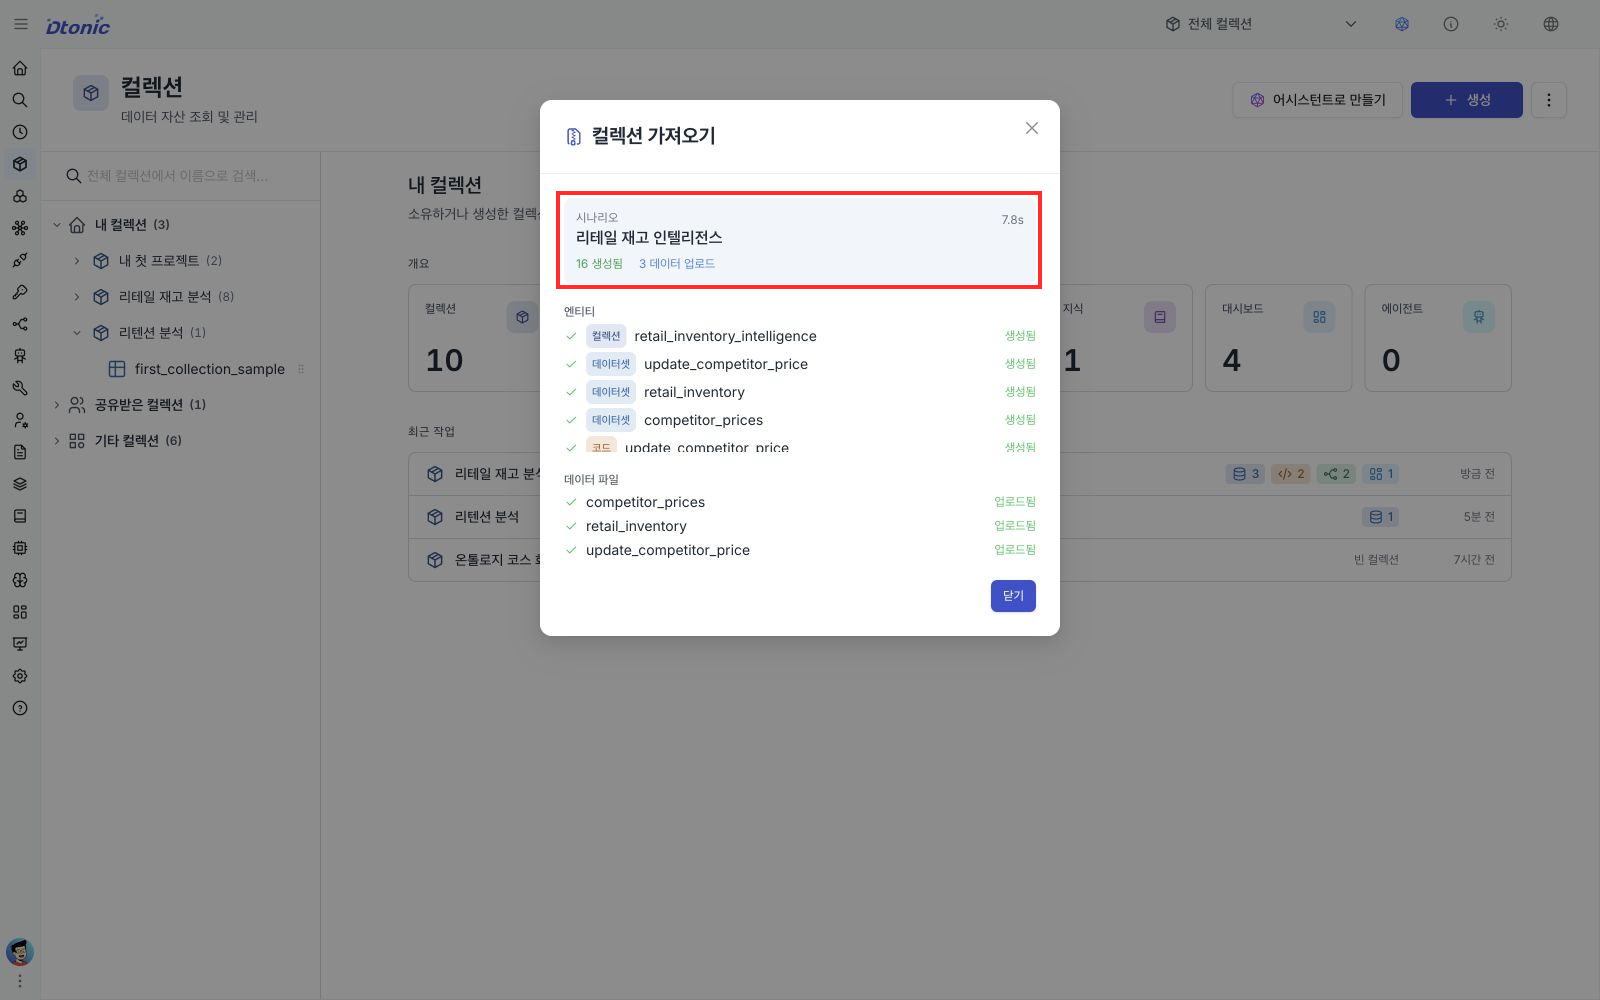
In an environment where validation passes, the expected result for this ZIP is 16 created, 3 data uploaded. Scenario and product versions can change these counts, so inspect every result status instead of relying only on a fixed number.
4. Review the result list
On the completion screen, inspect both Entities and Data Files instead of checking only the success count.
- Confirm that all 16 Collection, Dataset, Code, ontology, Pipeline, and Dashboard items are Created.
- Confirm that three data uploads completed.
- If an item is Failed, record its name and error, and do not immediately import again. Contact your administrator.
Close the completion dialog and open the retail_inventory_intelligence collection. Confirm that it contains:
- 3 datasets
- 2 Code items
- 2 Pipelines
- 1 Dashboard
- the imported ontology definitions
The ZIP also contains definitions for the ontology_graph_query Agent Tool and the retail-assistant Agent. With the ZIP's current directory layout, Portal browser import does not register those two definitions. Use Quick scenario import (advanced, 10 min) when you need both definitions as well.
5. Verify data rows
- Select the
retail_inventorydataset in the collection. - Open the Data tab.
- Confirm that column names and data rows appear in the table.
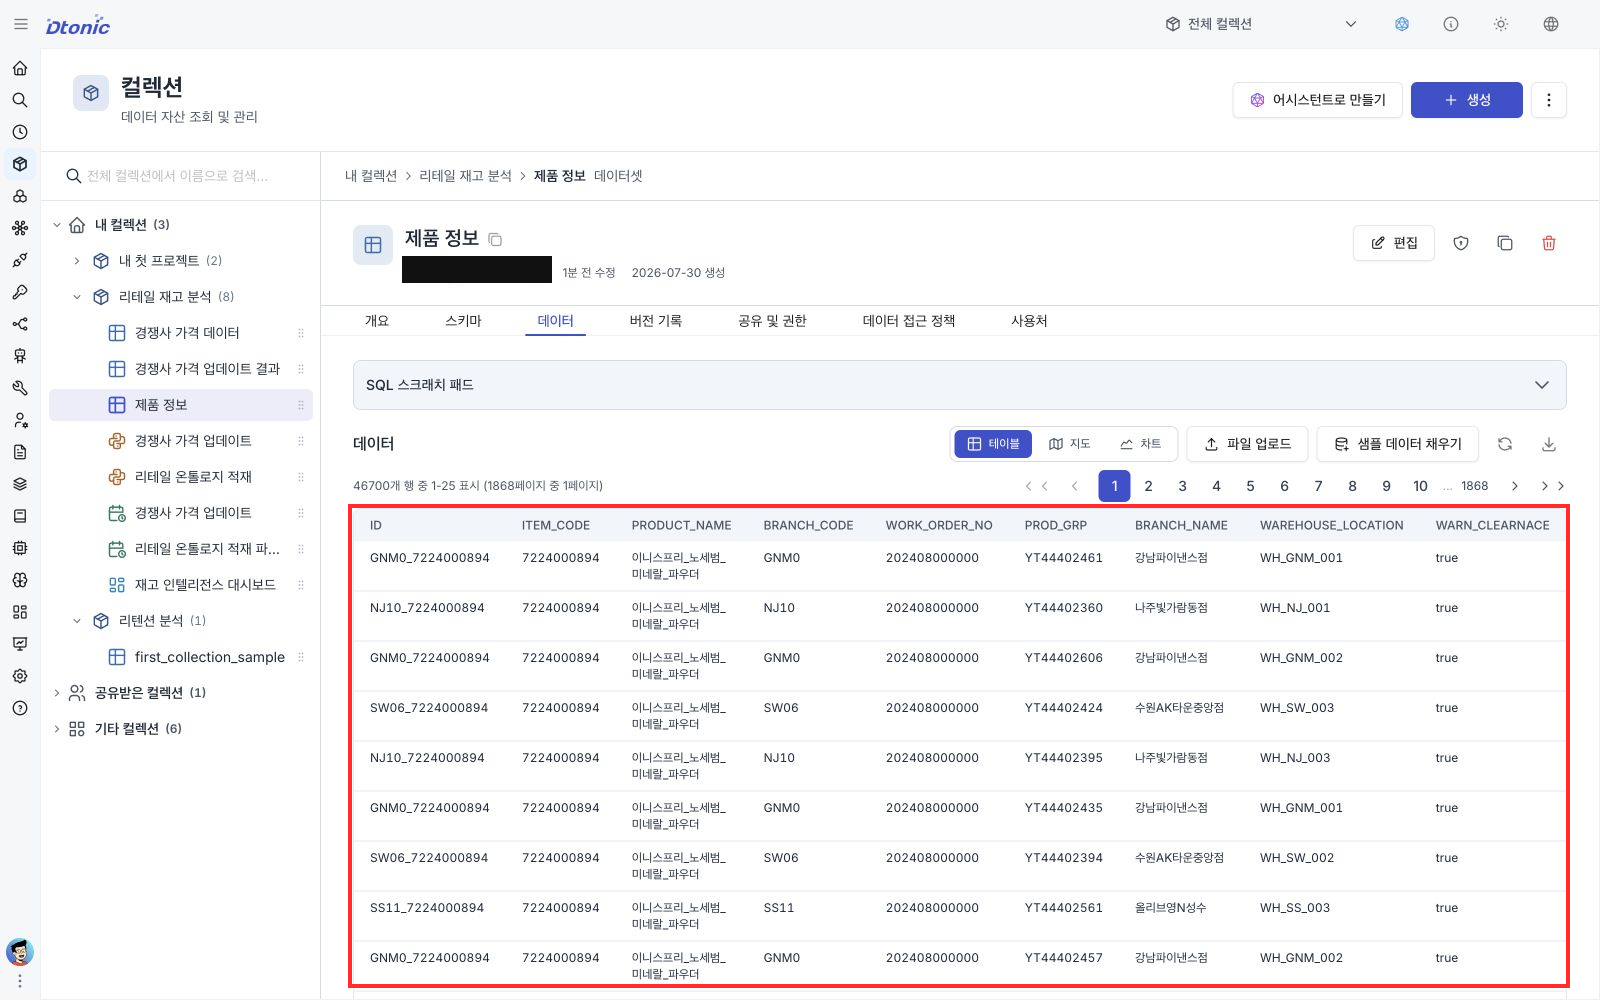
When the rows are visible, you have completed this import tutorial.
Next steps
- Continue with the pipeline, ontology, dashboard, and Agent sections of Retail Inventory Intelligence.
- To practice another scenario, start Choose a CNC inspection order from three HIGH alerts.
- To automate scenario import with Python, see Quick scenario import (advanced, 10 min).