Create your first collection (5 min)
Create a collection, register a CSV as a dataset, and inspect its data.
By the end of this tutorial
- Create a new collection.
- Register a CSV as a dataset and inspect it in the Data tab.
- Learn how the name, alias, description, and tags are used.
Download the sample CSV. It contains three rows with customer segments and purchase amounts. Using this file keeps the dataset and column names aligned with the next AI Assistant tutorial.
1. Create a collection
- Open Collections from the left navigation in Portal.
- Select Create in the upper-right corner.
- Complete the fields in the creation dialog:
- Name: A unique identifier used by the system and API. It must start with a lowercase letter and contain only lowercase letters, numbers, and underscores, such as
retention_analysis. It must be 1–63 characters and unique. - Alias: A readable display name, such as
Retention analysis. Lists and detail headers can show the Alias before the Name. - Description: A one-sentence summary of the collection's purpose.
- Tags: Searchable terms such as the business domain or team.
- Name: A unique identifier used by the system and API. It must start with a lowercase letter and contain only lowercase letters, numbers, and underscores, such as
- Select Create at the bottom of the dialog.
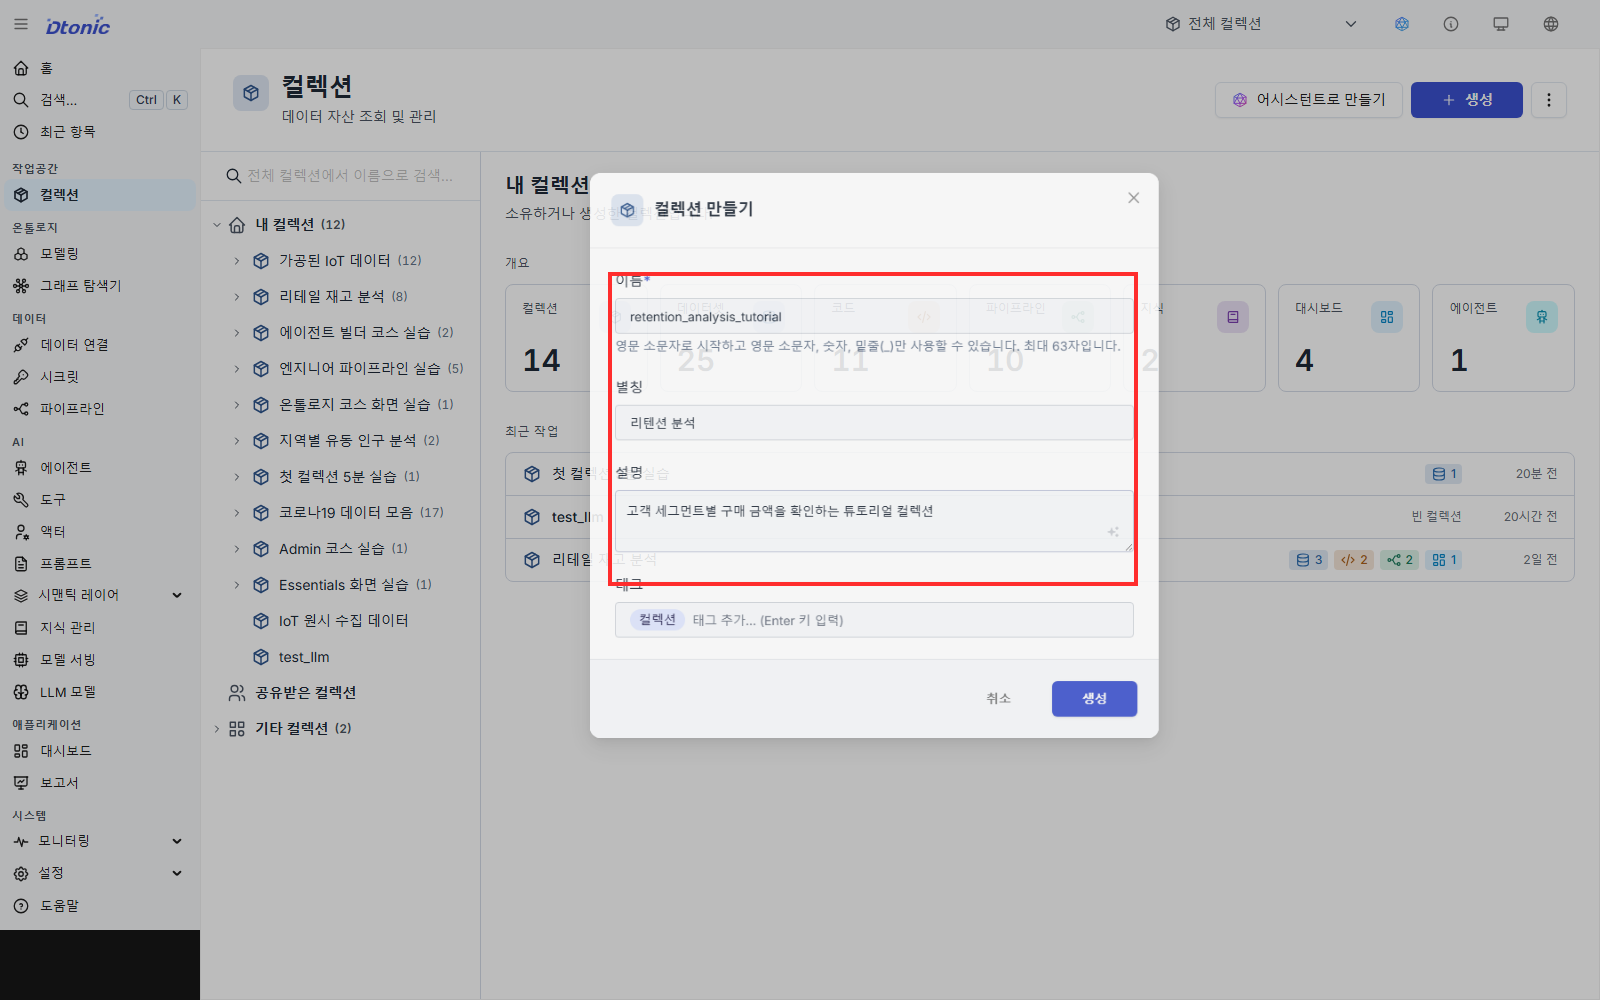
Portal opens the new collection and shows Add item, Share, and Edit. The current creation dialog does not have a field for assigning an owner. Portal displays ownership based on the user who created the collection.
If you cannot see the Name you entered, do not assume creation failed. When an Alias is present, the list shows it first. Open the collection and use More details or Edit to check the Name.
2. Register a CSV as a dataset
- Select Add item in the upper-right corner of the collection.
- Select Quick add… from the menu.
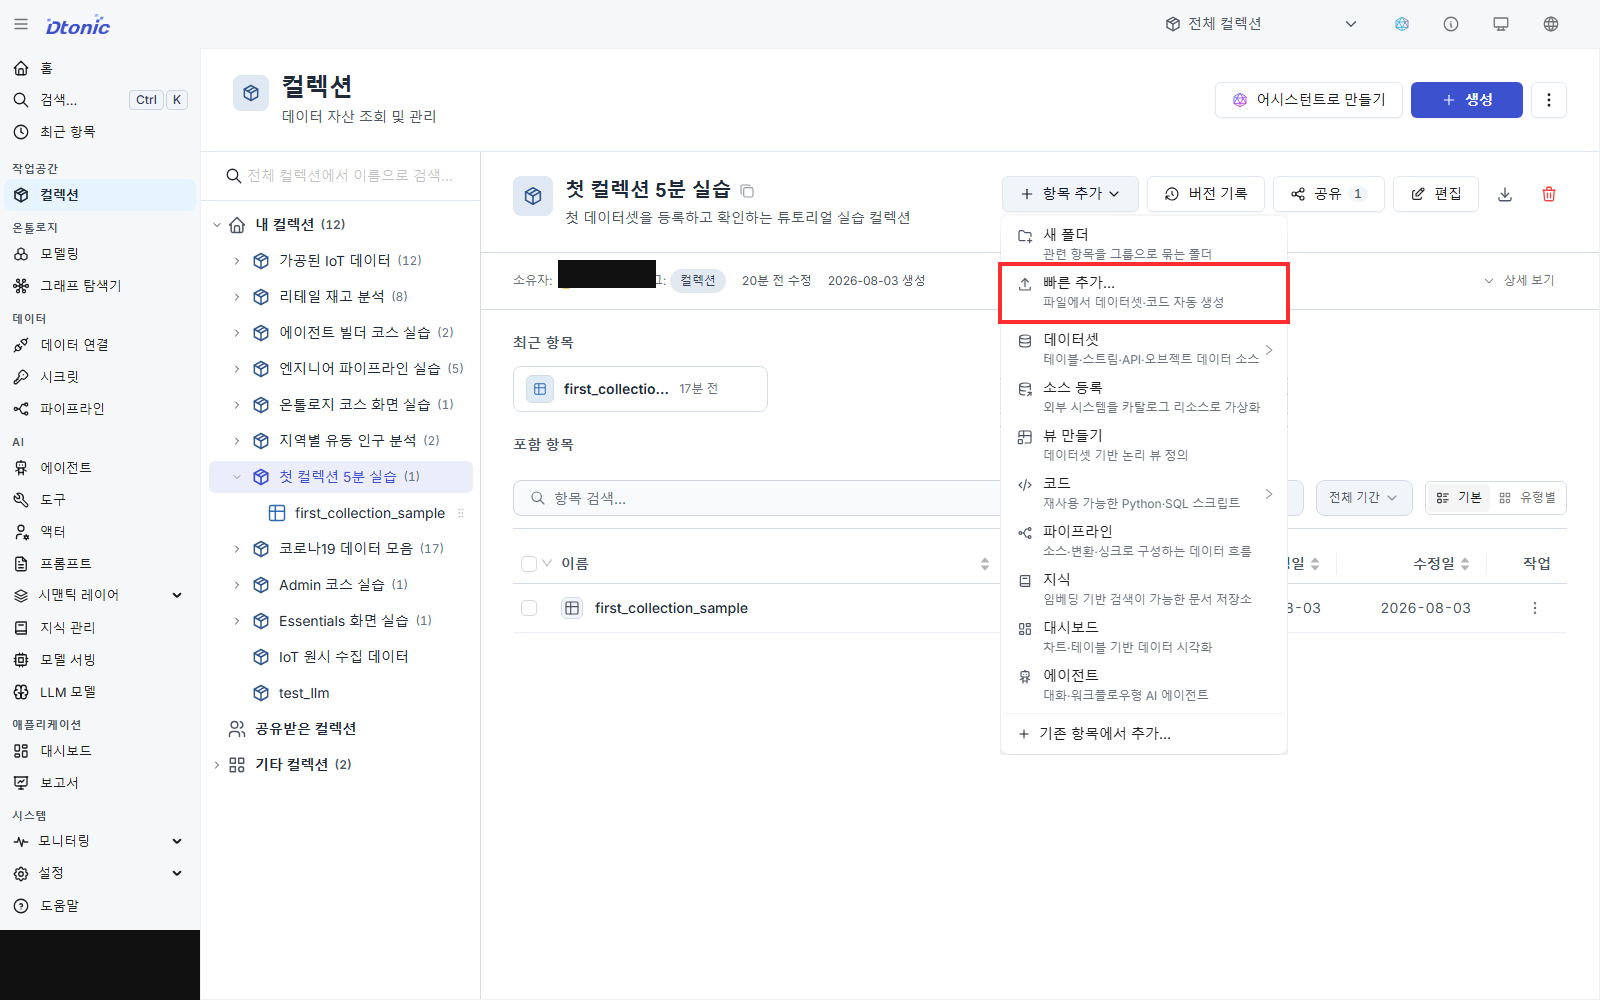
- Select the upload area and choose your CSV, or drag the file into it.
- Confirm that TYPE is Dataset and SUBTYPE is Table. CSV is the input file format; D.Hub creates a table dataset from it. Check that the first row appears as column names in the preview. You can correct unsupported names here.
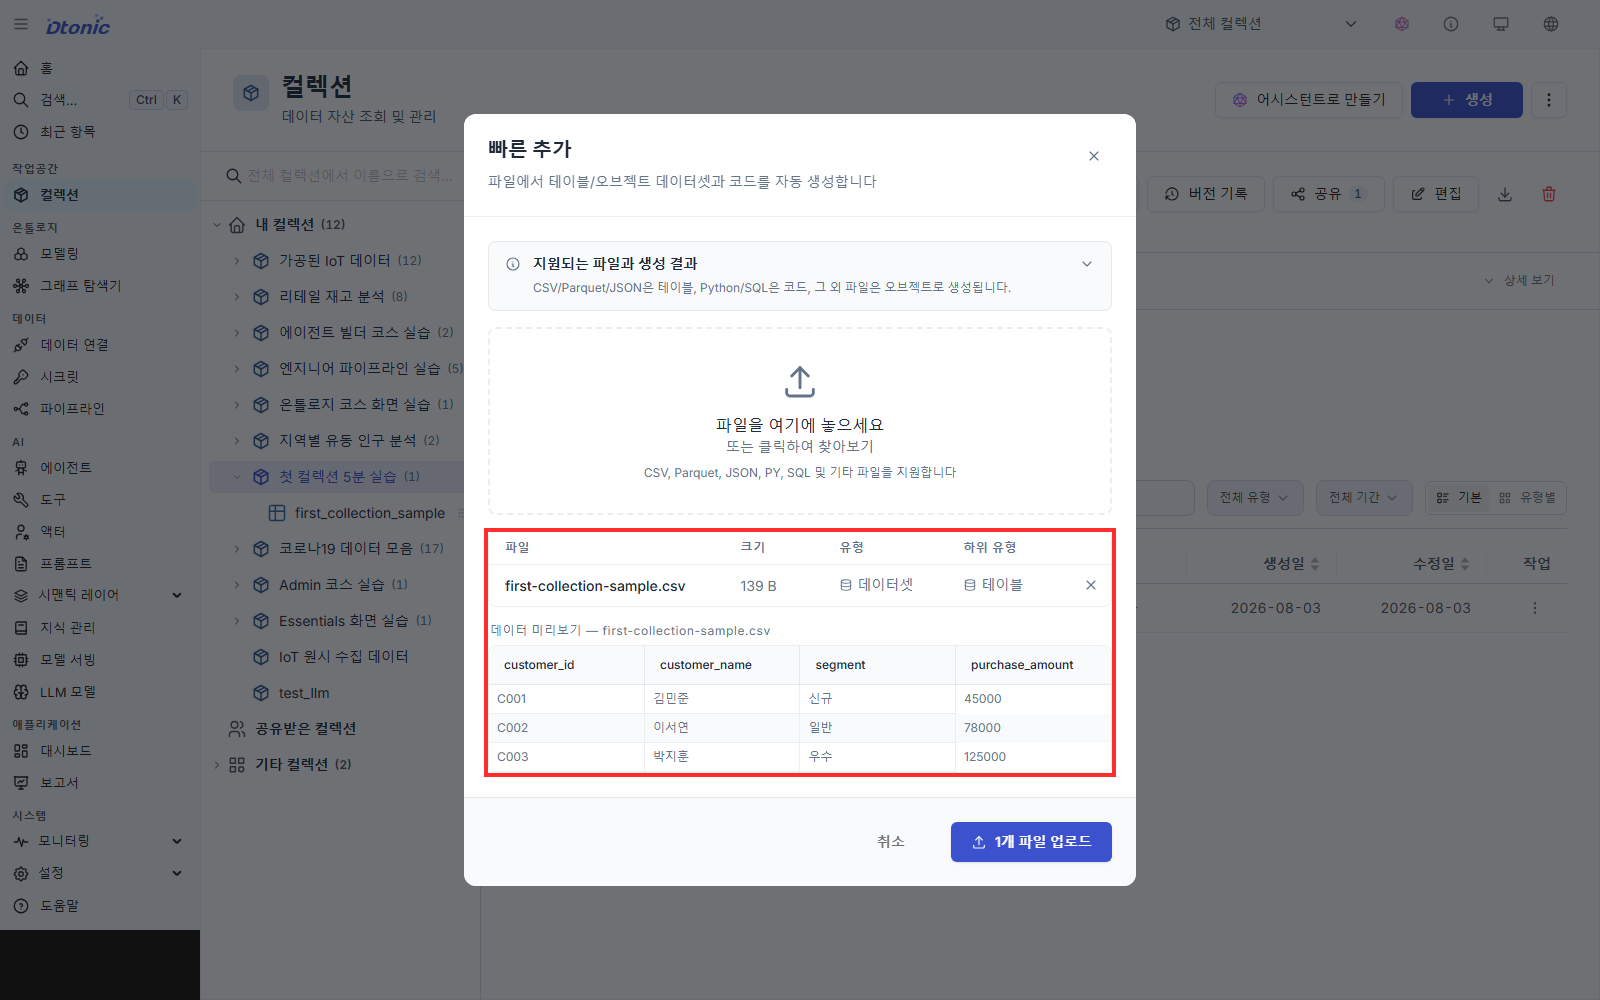
- Select Upload 1 file(s). The upload succeeded when
1 resource(s) created successfullyand the dataset name appear on the result screen. - Select Close to return to the collection.
Portal creates a dataset from the CSV filename and shows it in the collection's item list.
3. Inspect the registered data
- Select the new dataset from the collection's item list.
- Open the Data tab.
- Confirm that the CSV columns and rows appear in the table. If the CSV contained three data rows, the table should show three rows.
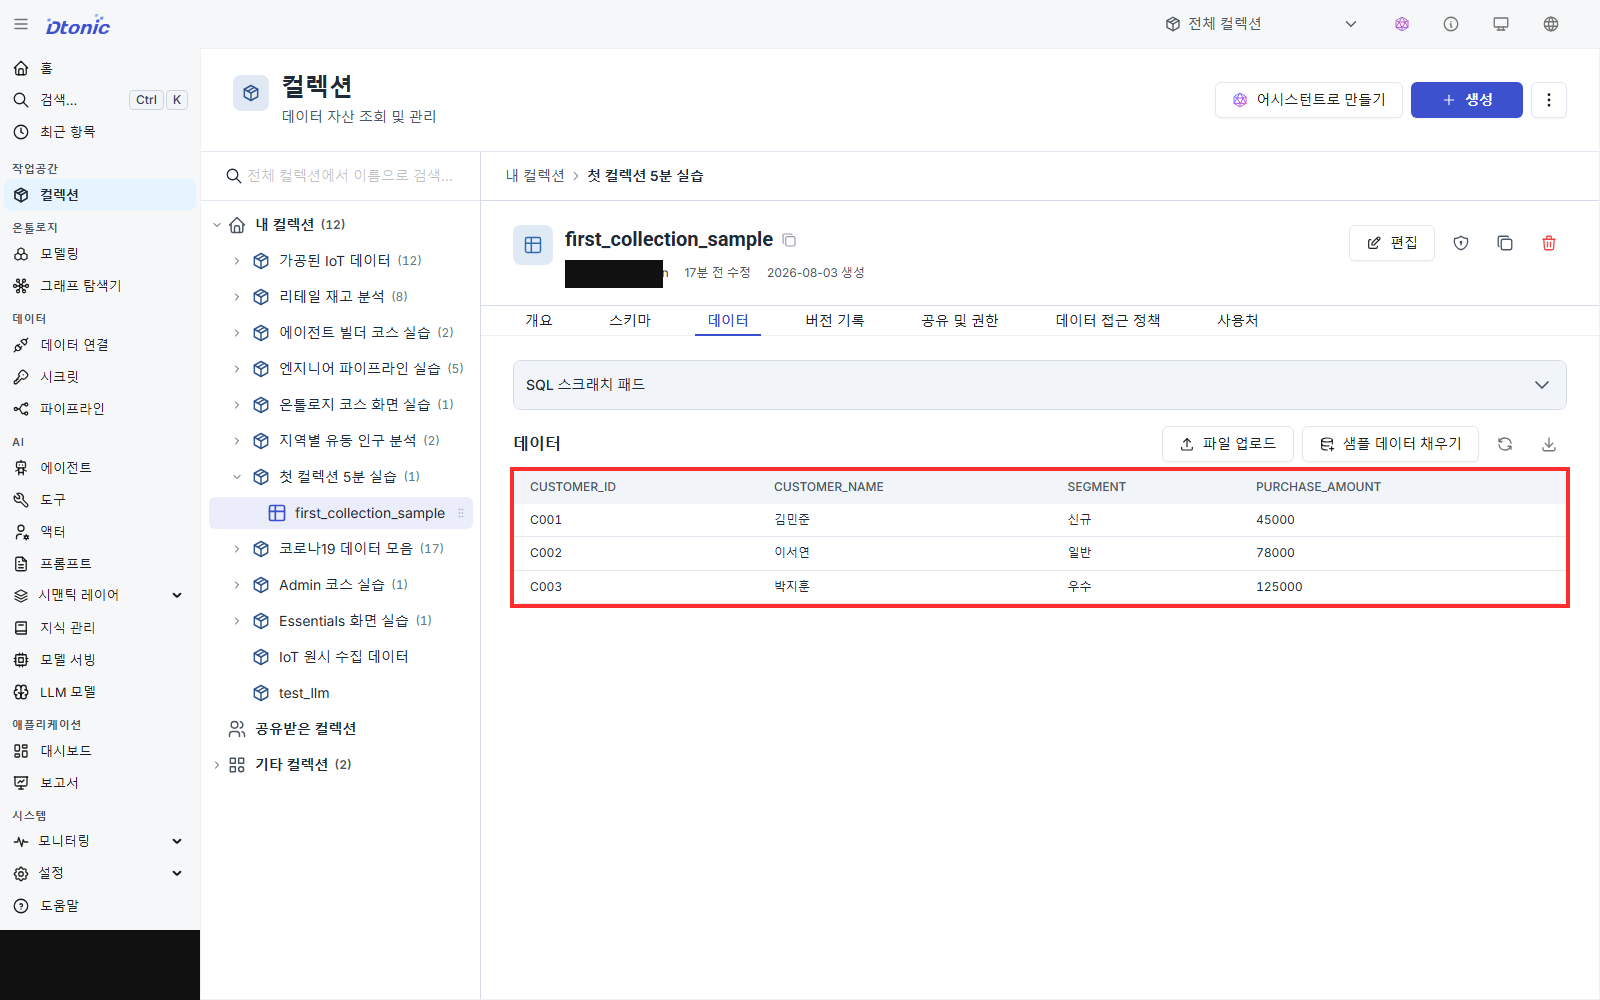
Once the table is visible, you have completed the collection and CSV workflow. In the dataset's Overview, you can improve metadata such as its alias, description, and tags. A useful description tells readers what the data covers, when it applies, and the granularity of each row.
If you do not have a CSV, use a small scenario file from dhub2-examples.
If something does not work
- Create is disabled: Check that Name starts with a lowercase letter and contains no spaces or hyphens.
- The first CSV row appears as data: Add column names to the first row and save the file again.
- Upload is disabled: Look for a red validation message in the file row or under a column name.
- No rows appear in Data: Confirm the success message and make sure you did not open a different dataset with a similar name.
Next steps
- To build a first visualization from the same collection, continue with Build your first dashboard and widget.
- To share the collection, grant Reader access to the appropriate users or groups from the collection's permissions screen.